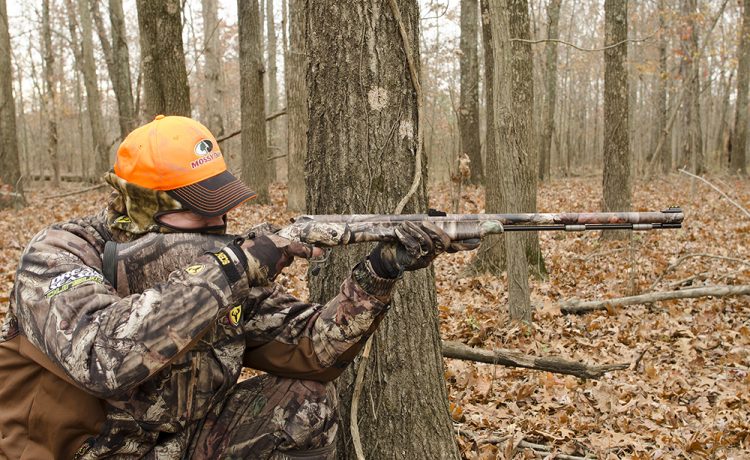
You say you love camo but you don’t know how to camo a gun. If that’s what’s stopping you, Mossy Oak Graphics has you covered. With our gun kits you can cover your guns in your favorite Mossy Oak pattern in 5 steps.
Please note that the following post on how to camo a gun is specific to camouflaging a rifle, but if you have a shotgun or an AR-15, we have kits for those too.
Preparation:
If you are like most people I’m sure that reading about the preparation of how to camo a gun is like reading the instructions on, well… anything. It can be tedious and nobody has time for that. STOP RIGHT THERE. You are about to turn your rifle into a camo’d masterpiece! You can’t put a timer on that. For the best results follow these two simple steps of preparation:
Prep Step 1: Using a little bit of isopropyl alcohol on a clean rag or paper towel, clean your rifle thoroughly. Make sure to clean where the barrel meets the forearm and in any other recessed areas. Cleaning all of the oil off helps to ensure that the adhesive vinyl will stick to your rifle.
Prep Step 2: Before you learn how to camo a gun we recommend that you loosen the recoil pad on your rifle. Using a screwdriver, create a small space that you can later fit your knife in to cut away any excess material at the end of your rifle.

NOTE: If you’re an avid hunter, you may want to consider using our primer stick to ensure the adhesion of your wrap withstands the elements.
That’s it, now you are ready to read about how to put camo on a gun!
Application:
Let’s start by identifying all the different pieces that Mossy Oak Graphics provides in your kit. Included in your rifle kit should be a piece of camo vinyl for the barrel, two pieces for your forend, two pieces for the stock, and a piece for the receiver.
Step 1: The Stock
- First, you will want to peel the backing off of the material and position it on your rifle so that you have equal amounts on the top and bottom. Also, make sure that this piece of camo vinyl wraps halfway around your stock.

Once you have it laid down where you want you will want to apply some pressure using your fingers. Start in the middle and push out to smooth out the material. See a wrinkle? No worries! Because of our awesome, well-made product you can pull the camo vinyl up to the wrinkle and lay it smooth again without harming the material or your rifle.
 On to the curves. You’re going to want to get that heat gun ready. By applying heat to the material you can get it to conform to every curve. Once you start heating up the material you will notice it starts to soften and then you can use your fingers to press it down into those curves.

Because you followed prep step #2 you’re ready to trim away any excess material. Since you loosened your recoil pad earlier you can now stick your knife in the crack between your stock and recoil pad. You can use the stock as your guide to cut off any excess material on the back of your gun.

*Repeat this step for the second stock piece.
Step 2: The Forend
- Let’s start on the left side. Before pulling the backing off you will want to hold your forend piece over your rifle and try to measure allowing yourself about ½ inch on either end. Then trim that piece off to length. Now you can pull the backing off and apply it to the left side of your forend.
- When laying the material down, we recommend that you lay it down far enough that you will have enough material to cover the front of the barrel – you can always trim it off later.
- Tip: If you don’t like the look of the straight seam that comes together between the forend and the already completed stock, we have a tip for you. On this end of the forend piece, cut an irregular or wavy edge and then lay it down and apply pressure. This will make your seam almost impossible to see – you have just camouflaged your camo’s seam.
- Use pressure with your fingers to secure the camo vinyl on your rifle. In doing this you will notice the piece where your sling would hook up – identify where that piece is and make a small slit on either side of it. The material will wrap right around it.

Now for the round end of your forend. As we mentioned earlier, you can heat this material up and it will conform to curves but there is a limit to how much it can conform – shocking we know but we have a solution! On something this round we recommend that you make, what we like to call, a relief cut. By making a relief cut and overlapping the material you eliminate any wrinkles that a round edge may otherwise cause.

- When trimming off excess material make sure to trim down where the magazine is. It is important to cut around this piece so that even though it is wrapped, your gun will still mechanically function.
- Remove the bolt out of your gun and then use the same process as above to install the forend piece on the right side of your rifle.
Some people stop here. Let’s face it, your rifle looks pretty amazing already. But if you really want to show your love for camo you can’t stop now. You gotta continue onto the final steps because you are no quitter. You are ready to cover the rest of your rifle in Mossy Oak Graphics camo vinyl.
Step 3: The Barrel
- First you will want to measure your barrel length by holding up the material to the barrel of your rifle. Make sure to give yourself about ½ inch extra and then cut off any excess material from there.
- Now you are ready to pull the backing off and lay it down on the top of your barrel. Working from the top of the it around to the bottom side of the barrel apply pressure with your fingers to press down the material.
- Use your heat gun to apply a little heat where the forcing cone is.
- Take your knife and make a trim right along the edge of where the forend and barrel meet.

- Now that you have trimmed your barrel piece down to the forend you can wrap the material around the rest of the barrel. Wrap one side down first applying pressure with your thumb until half of the barrel is covered. Then you can make a trim and lay down the other side.
- All that is left to do is trim any excess material left covering the end of your barrel.
- Tip: To trim back the excess material at the end of your barrel hold your knife at a 45 degree angle. Doing this will ensure that none of it hangs over the end of your barrel.
Step 4: The Receiver
Before you start applying the material to the receiver, be aware that you don’t want to cover the mount where the scope goes. This is a very important step in learning how to camo your gun.

- Take your last bit of camo vinyl in your rifle kit and cut it to size.
- Attach it to that small area and make any necessary trims.
Step 5: Post Heat

There is one last important step – post heat. Once you have finished your entire rifle wrap use your heat gun to heat up the whole gun. For best results do one section of your gun at a time and use your fingers to apply firm pressure.
This final step resets the memory of the camo vinyl so that it conforms to your rife especially in all those curved or recessed areas. Take about 10 minutes to complete this step.
How does it look? Fantastic we’re sure! Show us on our facebook page!
This is an amazing application durable enough that you can enjoy it for years.
Mossy Oak Graphics is waterproof, weatherproof, and removable at any time. If you are using Mossy Oak Graphics you don’t have to worry about being stuck with one pattern on your rifle forever. Our gun skins won’t leave any adhesive residue behind and are removable whenever you’d like them to be. At Mossy Oak Graphics we make versatility and installation easy and inexpensive. Need a visual of any of the steps we covered on how to put camo on a gun? Check out our installation video.
Now that you are a pro on how to camo a gun, what will you learn to camo next? Your hunting boat maybe? We have an awesome blog post on how to camo a boat.