You already have the best camera for wildlife photography, now up your concealment factor with Mossy Oak camouflage for your photography. Here’s how to camouflage a camera, a wildlife photography tip you’ll be happy you learned.
While there’s plenty of other factors that contribute to your wildlife photography success, camouflage gear for wildlife photography will not only contribute to getting the shot you want, it will also keep your bird watching camera or wildlife photography camera in tip-top shape.

The Benefits Of A Vinyl’d Camouflage Camera
There are multiple benefits of a camouflage camera when it comes to wildlife photography or bird watching.
The first is the ability to visually blend into your environment for better concealment, avoiding detection if you’re able to remain still and quiet. With over 40 patterns to choose from, you’ll certainly be able to blend into your environment no matter what wildlife you’re trying to get photos of. If choosing a camouflage pattern seems overwhelming, take a gander at our article “The Search For The Right Pattern” which will help match patterns to physical environments. Our camouflage vinyl also has a military-grade matte finish, meaning it will blend in very well with no reflection that may cause a distraction or alert animals to your presence.
Just remember, many animals use their sense of smell and hearing to detect threats and activate their internal safety systems, and photography camo alone won’t help that.
“I love this pattern it looks amazing on my canon 70-200mm lens. Definitely an eye catcher. Will purchase it again.” - Clinton M

The second perk to camouflaging your wildlife photography camera with Mossy Oak Graphics camo vinyl is protection. Our camouflage vinyl protects the surface below it from sun, branches, or rain. We’re so confident in the quality of our camouflage vinyl we offer a 5-year no fade warranty. Your camouflage camera will be protected from the elements, so you can focus on the task at hand. Blend in while protecting your camera’s surface - that’s a win-win.
The third perk? Our camouflage vinyl is removable (even after 9 years)! For those wildlife photogs who are at it year round, you can easily remove our camouflage material from your camera and swap your pattern for the next season. To remove, use a heat gun or hair dryer to warm it up. This softens the adhesive enough to easily pull it off. Start in a corner and pull the vinyl back against itself and it’ll come right off. Your Nikon, Canon, or Sony wildlife photography camera will look like the day you applied it underneath!
“Used this on my large wildlife lens. Works great, moving the large white lens coated with camo does not spook the birds as before! Thank You for a great product !” - layton p
One question you might have - will this vinyl interfere with my camera controls or moving parts? The answer is easy - No, it will not. We’ve heard from customers who have camouflaged their camera using our vinyl and have multiple testimonials that it did not interfere with the controls or moving parts of the camera! Our camouflage vinyl is very thin, and will stay out of the way of the lens zoom extension and retraction. Create the wildlife photography camera of your dreams with our camouflage vinyl.
“I love it. I used it in my Canon EF100-400 mm lens. What I really like is I can cover up the barrel of my zoom lens. The material is so thin, it doesn’t interfere with the zoom operation.” - Rick G

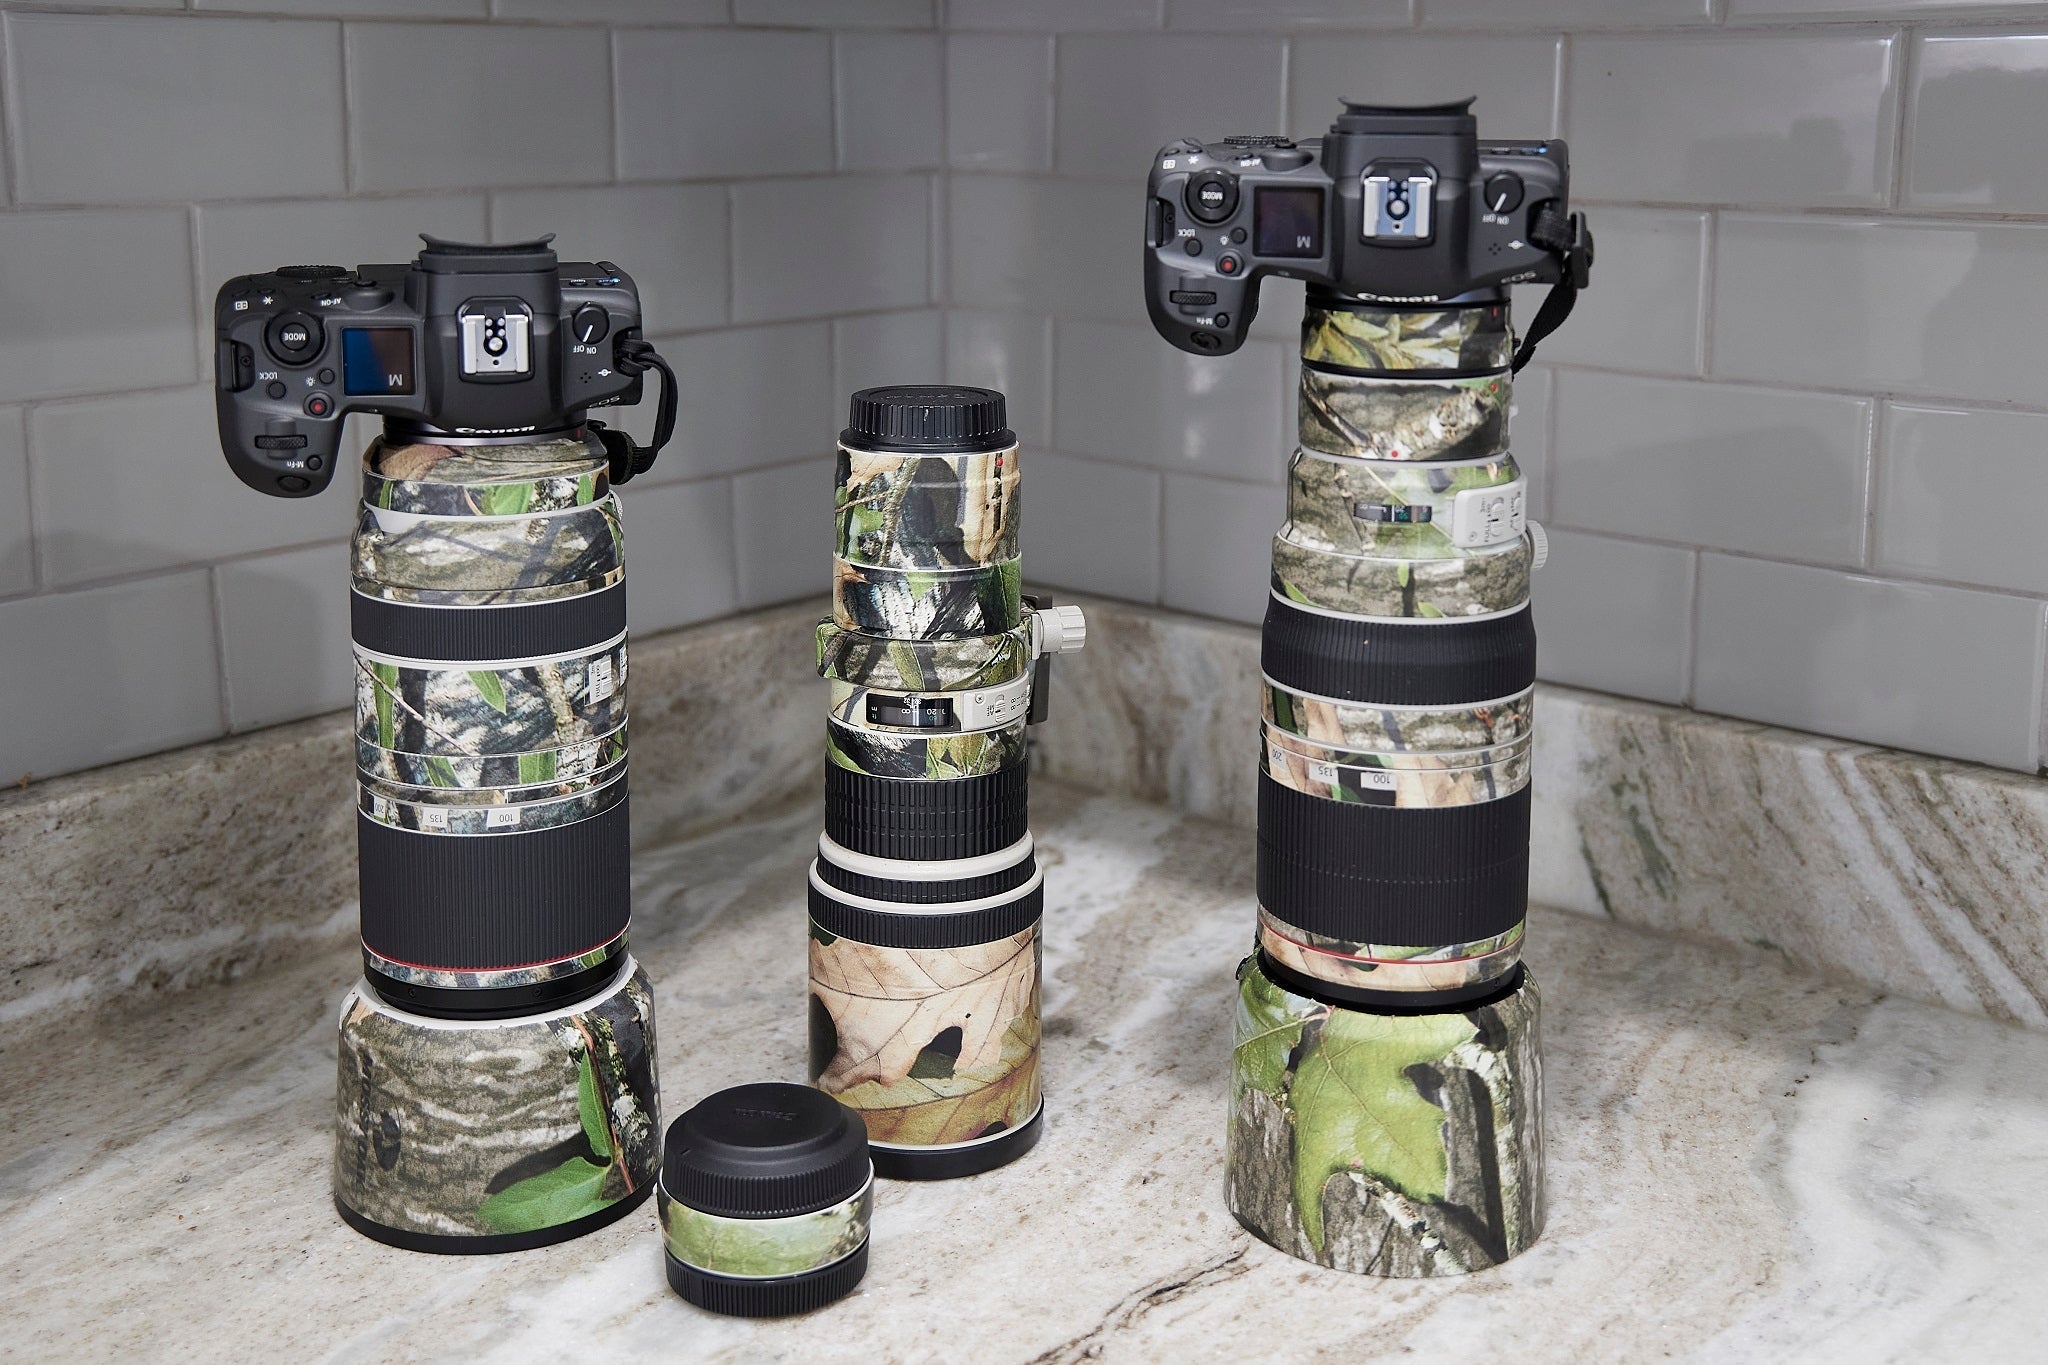
Aside from your camera, our camouflage vinyl can also be used to cover your tripod legs! Our customers use our vinyl in some pretty unique and interesting ways, we’re sure aside from your camouflage camera or tripod legs, you could put any extra material to good use like these customers did. Are there other items you take on your wildlife photography excursions? If it’s a rigid, smooth surface, cover it in camo!
How To Camouflage A Camera
Let’s get to the good stuff. So, how do you camouflage your wildlife camera?
Our camouflage vinyl tape for camera lens is easy to apply, and fits any camera model with a little trimming provided you order enough material. Canon? Nikon? Sony? Doesn’t matter - with a little heat and a small blade, you will stretch the material and trim to fit your camera’s shape. Our material conforms to complex curves with a little heat, so with some patience and precision you’ll get a perfect application.
“Perfect for my lens and thin enough to cover the extending/retracting barrel.” - Richard S.
Step 1: Order Your Camouflage Camera Material
For cameras, our Matte Camo Gear Skin seems to do the trick. This Gear Skin comes as two sheets, each sheet measuring 8” x 14.5”. To check this will be enough, you can take a flexible tape measure to measure the coverage area of your camera. If you think you’ll need more, or just want a little extra in case of mistakes, order two of the gear skins and you’ll receive four 8” x 14.5” sheets which should be plenty to camouflage your wildlife camera. Or, you could order 1 of our Mossy Oak Matte Camo Roll in a 24” x 12” sheet. This will give you slightly more material, but be aware that the pattern on the Camo Roll is at full scale, while the pattern is a bit smaller on the Gear Skin (since that’s a smaller piece).
Just choose your pattern (remember there’s a helpful article on patterns matched to environments) and get your order in. Orders ship in 2-3 business days, and generally arrive in 4-5 business days (although these days with USPS there can sometimes be delays).
“Bought the rolls for my Canon RF 100-500mm and it looks awesome. Thank you.” - Daniel D

Step 2: Cut Your Strips
Before you start applying anything, we recommend you lay your camera on the material or measure out the strips you’ll need. For each section of camera you’ll wrap, cut a strip of that width out of the gear skin, at the length you’ll need to wrap it all the way around.
Once you have all your strips cut, you can lay them under the camera and line them up, making sure you’ve got everything ready to go before applying. Map each strip out to the part of the camera it will camouflage. When you need to overlap the material after it wraps all the way around (or in the event there’s any spots that for some reason you couldn’t cover with a full strip), DON’T WORRY. In Step 4, we’ll show you a trick that’ll make any seams in the camouflage vinyl disappear.
If you’ve mapped out your coverage areas against your cut vinyl, you’re ready to move on to Step 3.

Step 3: Prep Your Camera’s Surface
A very important part of the application process is preparing your surface for optimal vinyl adhesion. Before anything gets applied, make sure your camera is the right temperature - between 60 and 95 degrees Fahrenheit is perfect for our camouflage vinyl application.
Using a little bit of isopropyl alcohol on a clean rag or paper towel, clean your camera’s surface where you’ll be applying the camouflage. Cleaning all of the oil off, even from your hands, will help ensure the adhesive vinyl will stick properly to your camera. This is an important and often overlooked step that plays a critical role in the longevity of the adhesive.
Step 4: Apply The Vinyl To Your Camera
Now, the good stuff.
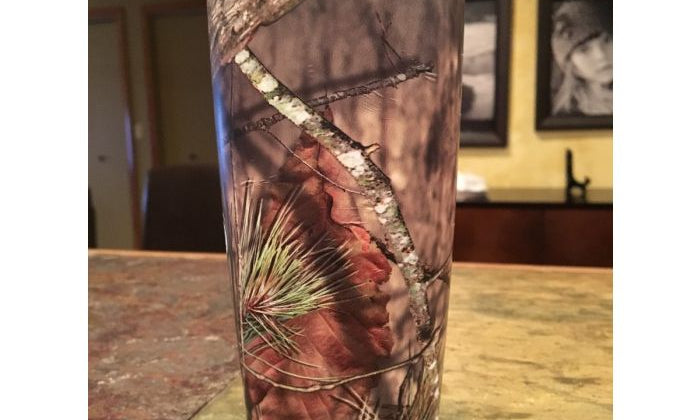
Peel the backing off one strip of your Gear Skin. Lay the part of your camera that matches the width of that strip onto the vinyl. Just like John does in the video below with the cylindrical tumbler, wrap the material around your camera. Gently stretch the material, press it down, and rub the material back and forth as you go along to press out any air bubbles.
If you get any wrinkles, fear not, you can pull the material back off, stretch it straight, and reapply. Mossy Oak Graphics camo vinyl uses pressure-activated adhesives allowing film to be repositioned until firm pressure is applied.
In any spot where your camo is overlapping itself, use this awesome trick. On the straight edge of the vinyl, use scissors to cut that edge into a wave. When you overlay that wavy edge on top of camouflage, that edge will disappear completely. On the rest of the edges, use an exacto knife or other small blade to trim off the excess material, creating a perfect fit for your camera.
Step 5: Apply Post-Heat
One of the most underrated steps - post-heat. Once your installation is done, use a hair dryer to apply a little post head to the material, which will really activate the adhesive. We know your camera is valuable, and this doesn’t have to get too hot, just a bit to heat up the vinyl to be good and warm. While it’s warm, press down firmly on the material (especially around the edges with your fingers) to really lock the camouflage vinyl down.
Once that’s done, your camera is ready to go! Get you and your wildlife photography camouflage camera out into the wild and get your dream shot!
Camouflage For Wildlife Photography
If this sounds easy enough, it’s because it is. Take a gander at this gallery of customer submitted reviews and photos of their nikon, canon, and sony camouflage camera DIYs. If they could do it, we have every confidence that you can do it too. And once you do, please send us your installation pics, we love to see them!
Real Camouflage Camera Customer Photos & Reviews

Mossy Oak Graphics Gear Skins
If you’re ready to get going, what are you waiting for? Get over to our Gear Skins page, pick your pattern, and get your order in. We know when you’re done, you’ll absolutely love your custom, one-of-a-kind wildlife photography camouflage camera.